Picklist Editor
|
As the name itself says, picklist is a dropdown field with list of options available, within which, only one option can be selected.For instance, Lead status in Leads module.Picklist Editor can be used to customize the picklist values in different modules.Select a role before performing global actions such as add, edit and, delete; as the picklist values vary across roles.
Get started
Steps to customize your picklist values in vtiger CRM:
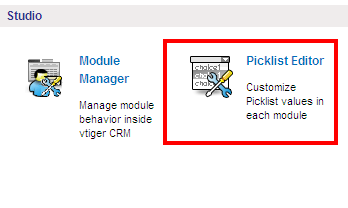
Click on Settings Icon > CRM Settings > Picklist Editor(This can be found under studio block)
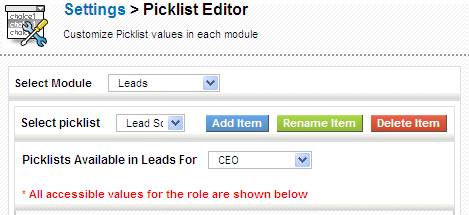
To customize picklist, select desired module from Select Module dropdown (ex:Leads); consequently, Select picklist dropdown displays respective picklist fields (Industry, Lead Source, Lead Status, Rating, Salutation) available for that module.This dropdown can be used to select the picklist field for performing global actions.
Add new Picklist values
Steps to add a new picklist value in vtiger CRM
- Click on the Add Item button next to the Select picklist dropdown.
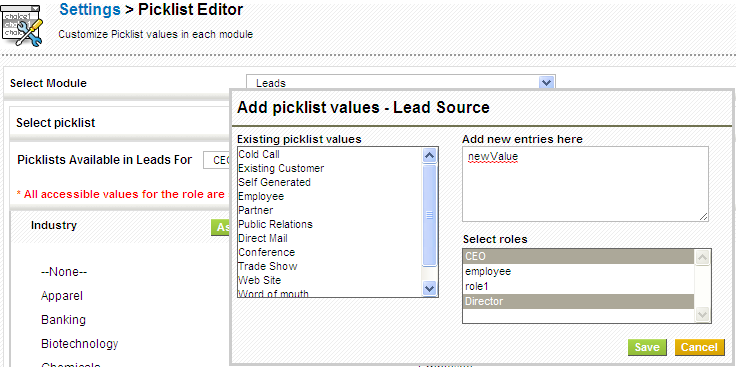
- This will bring up a popup with the existing picklist values displayed on the left-hand side.
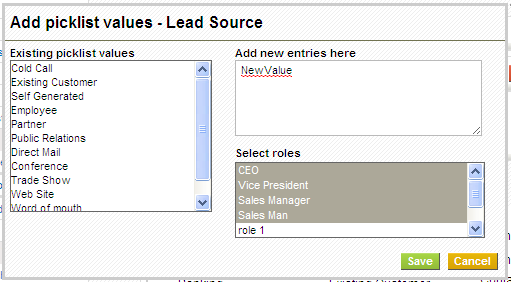
- You can add new values in textarea on top-right and assign role(s) on right hand lower side of the popup accordingly.
- Click Save to update your changes.
For instance, add 'newValue' to Lead source field in Leads module
Edit picklist values
Steps to rename the existing picklist values in vtiger CRM.
- Click on the Rename Item button next to the Select picklist dropdown.
- This will bring up a popup with the existing picklist values in select box.
- select a picklist value you intend to edit.
- you can edit the picklist value in the textbox below the existing picklist values.
- Once you are done with the changes, click on the Apply button to save your changes to the picklist.
Delete existing picklist values
This operation can be performed to delete the picklist value(s) of any module permanently.
Steps to delete values from the picklist in vtiger CRM.
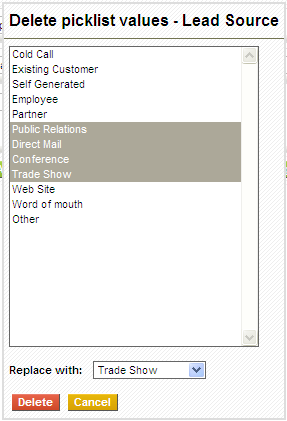
- Click on the Delete Item button next to the Select picklist dropdown.
- This will bring up a popup with existing picklist values.
- Select the value(s) you intend to delete, choose a value from Replace with dropdown and click on Delete button.
For example, delete picklist values(Partner,Public Relations,Direct Mail,other) and replace with 'Other'.
Deleted picklist values will be replaced with another value.The information stored in deleted values will be moved to newly defined value.
Create a custom picklist field
vtiger CRM also allows users to create new custom picklist fields using Custom Fields.
Steps to create new custom picklist field in vtiger CRM:
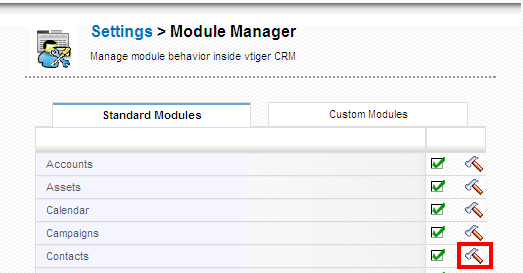
1.Go to Settings > Module Manager
2.Click on module settings icon, highlighted below, at extreme right of each module.
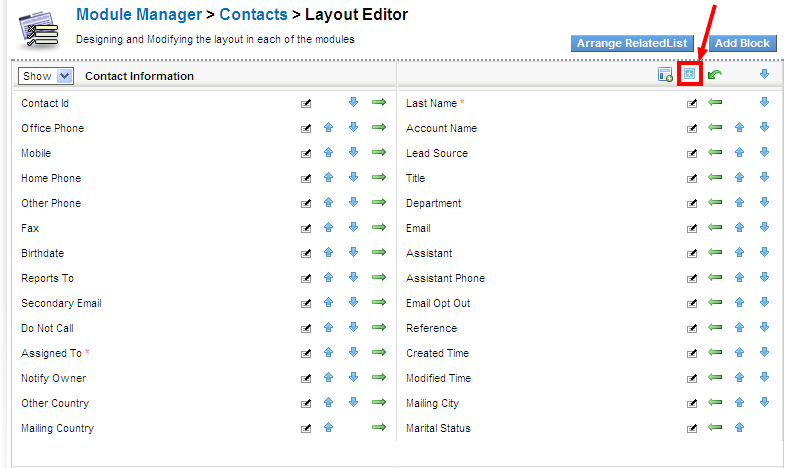
3.Click on Layout Editor
4.Click on add custom field icon, highlighted below.
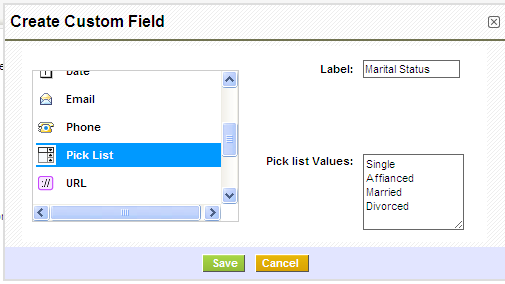
5.Select field type as Pick List on left hand side, provide a picklist name in Label on top-right, and provide values in Pick list Values textarea on righthand lower side of the popup.
Re-arrange Picklist Values
You can re-arrange the existing picklist values to the desired role in vtiger CRM.
Steps to customize your picklist values in vtiger CRM.
- Choose the desired module from the Select Module dropdown.; say Leads.
- Select the role to which the changes should be reflected from Picklist Available in Leads For field.
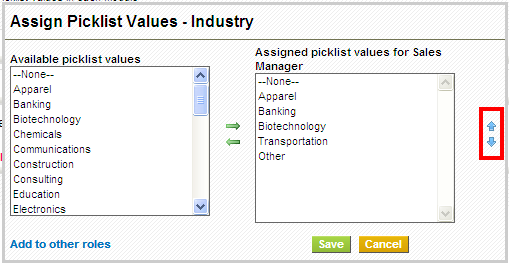
- Click on Assign button; Consequently, a popup will be displayed where you can add or deduct picklist values by transferring mutually.
- Re-arrange the picklist values by clicking on the arrows provided on the right side of the popup.
To imply the changes to other roles, click on the link Add to Other Roles, Select the desired role(s) and click Save button to update changes.
